Creating an Asset
Every asset in Formbird FLEET is created from an Asset Template — for example, Passenger Vehicle or Boat. Templates are specific to an asset type, which means each template collects only the fields that are relevant for that type of asset. For more on how templates and asset groups work, see Asset Details and Mapping.
There are two ways to create a new asset:
- From a blank template — start from scratch with all fields empty.
- By cloning an existing asset — copy selected fields from an existing asset to save data entry.
If you are setting up Formbird FLEET for the first time or migrating from another system, Formbird Support can bulk create assets from a CSV import as part of your implementation. Contact Formbird Support for more information.
Creating an Asset from a Template
Use this method when adding an asset that doesn't closely resemble anything already in your fleet.
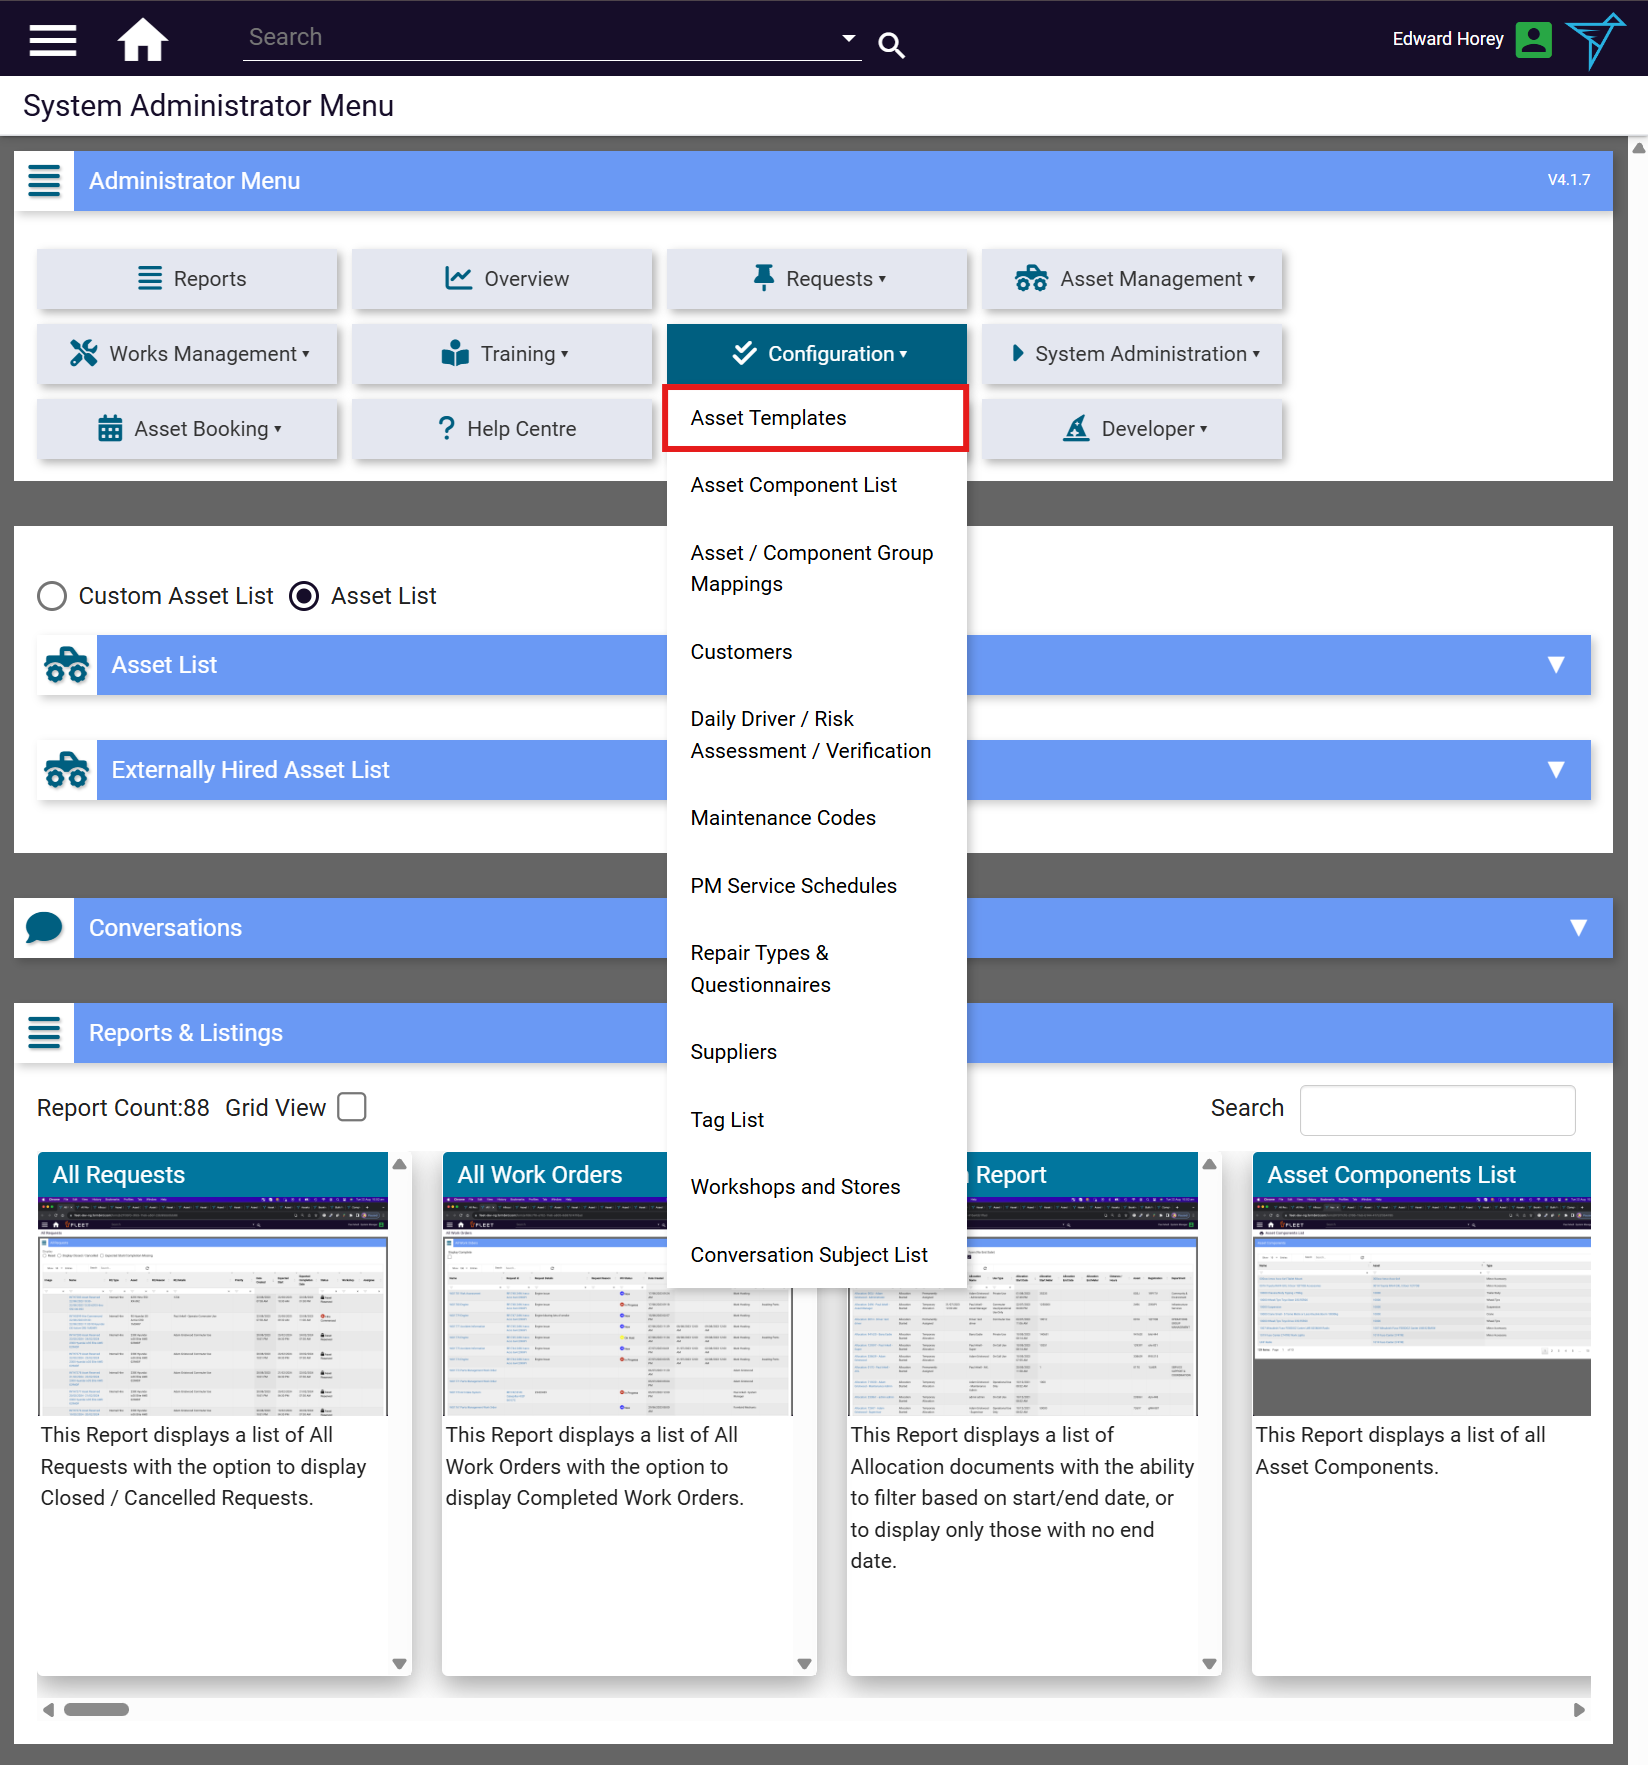
- From the System Administrator Menu, open the Configuration dropdown and select Asset Templates.
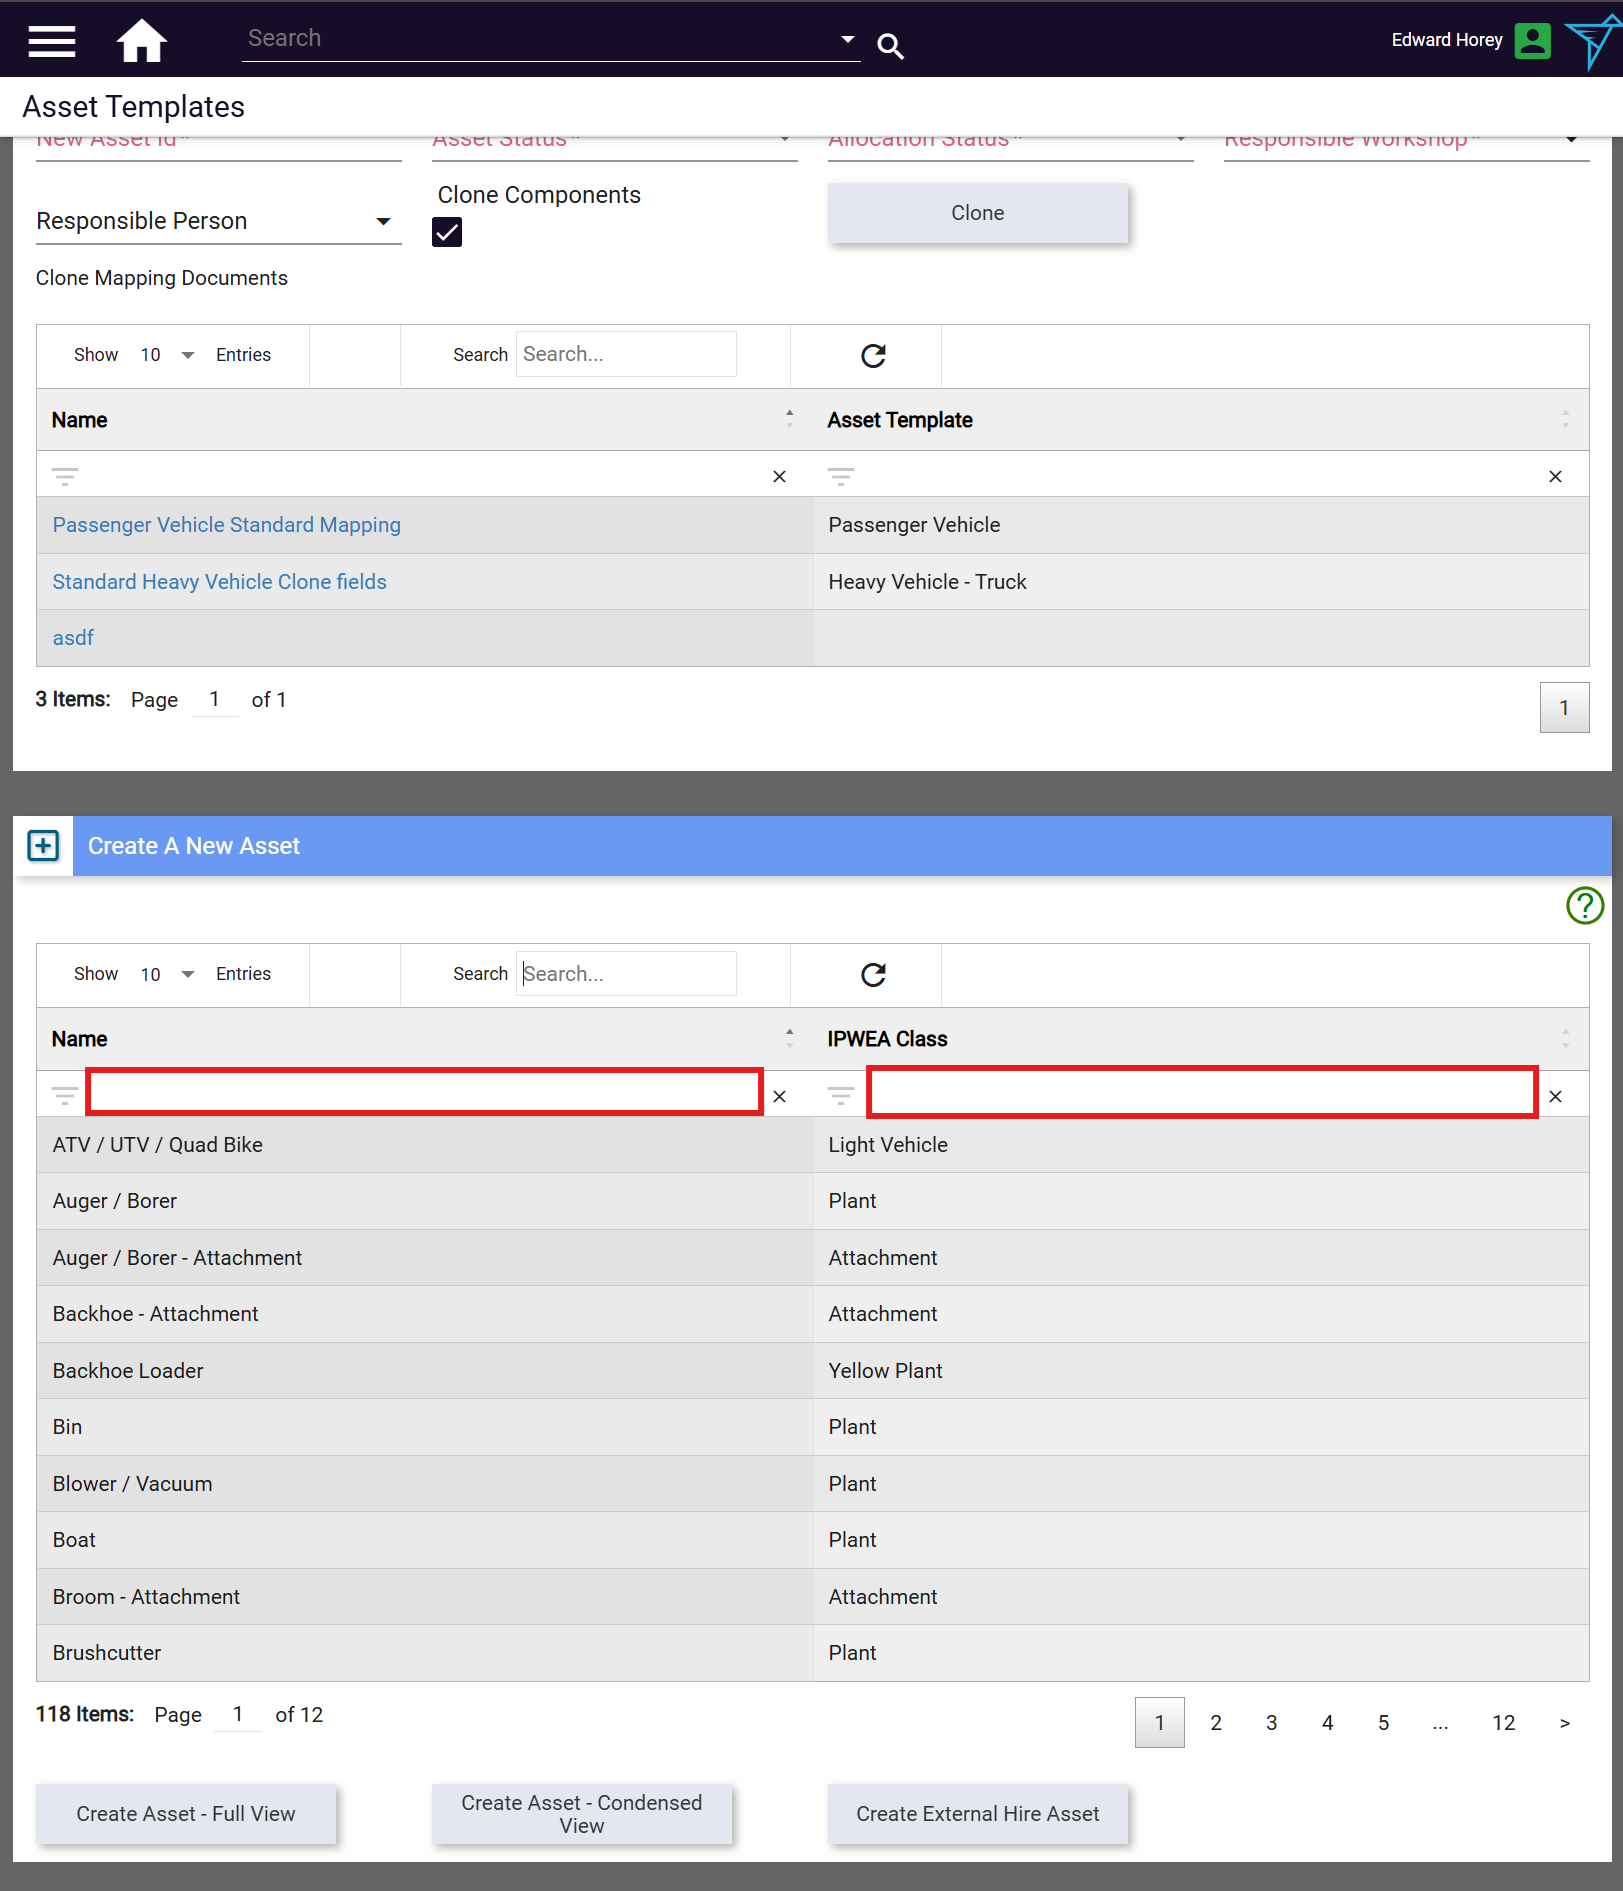
- Scroll down to the Create A New Asset table.
- Use the column filter boxes to find the right template. You can filter by Name (e.g. type
passengerto find the Passenger Vehicle template) or by IPWEA Class. - Select the row for the template you want to use.
- Select the appropriate create button:
- Create Asset - Full View — opens a template with all available fields for population.
- Create Asset - Condensed View — opens a simplified form with only the key fields. The asset is still a full asset after saving; remaining fields can be filled in later.
- Create External Hire Asset — opens a form with key fields plus fields specific to hired assets. See Hired Assets for more detail.
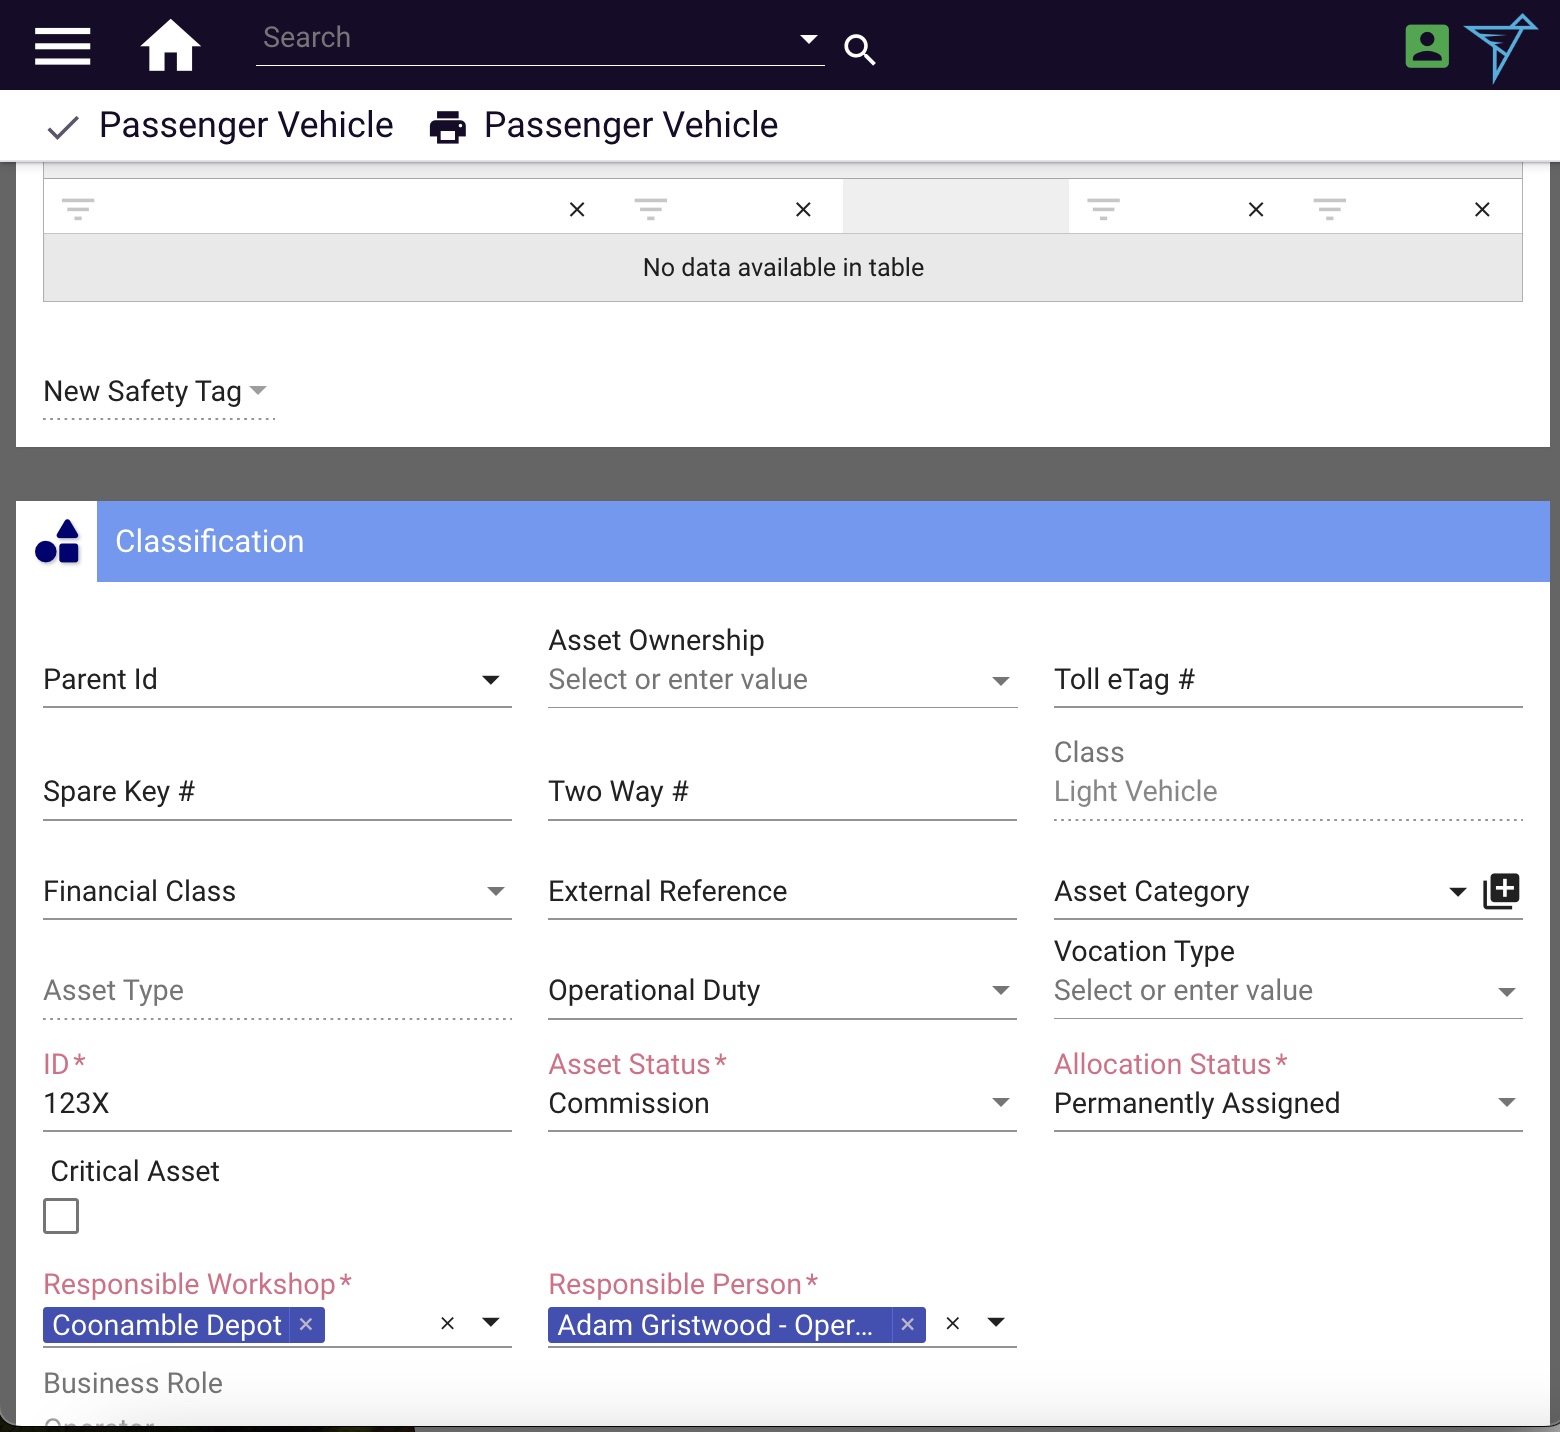
- Complete the mandatory and any other relevant fields.
- Select the save tick in the top-left area of the page.
Cloning an Existing Asset
Cloning creates a new asset by copying selected fields from an existing asset. This is useful when replacing an asset like-for-like or adding an asset similar to one already in your fleet.
Cloning requires a Clone Mapping document, which defines which fields are copied across. Clone Mapping documents are reusable — for example, a single mapping called "Passenger Vehicle Standard" can be used every time a passenger vehicle is replaced. See Creating a Clone Mapping Document below if one doesn't exist for your needs.
To clone an asset:
- From the System Administrator Menu, open the Configuration dropdown and select Asset Templates.
- In the Asset To Clone field, search for and select the asset you want to copy. Hired assets are excluded from cloning.
- If the asset has components, Asset Components To Clone is populated automatically. Remove any components you don't want to carry across by selecting the × next to them.
- Select the appropriate Clone Mapping document.
- Enter a unique identifier in New Asset Id.
- Complete the mandatory fields: Asset Status, Allocation Status, and Responsible Workshop.
- Optionally select a Responsible Person.
- If the asset's components should also be cloned, tick Clone Components.
- Select Clone. The new asset opens in a new tab with the copied fields already populated.

Creating a Clone Mapping Document
A Clone Mapping document defines which fields are copied when cloning. You can create multiple mapping documents for different use cases.
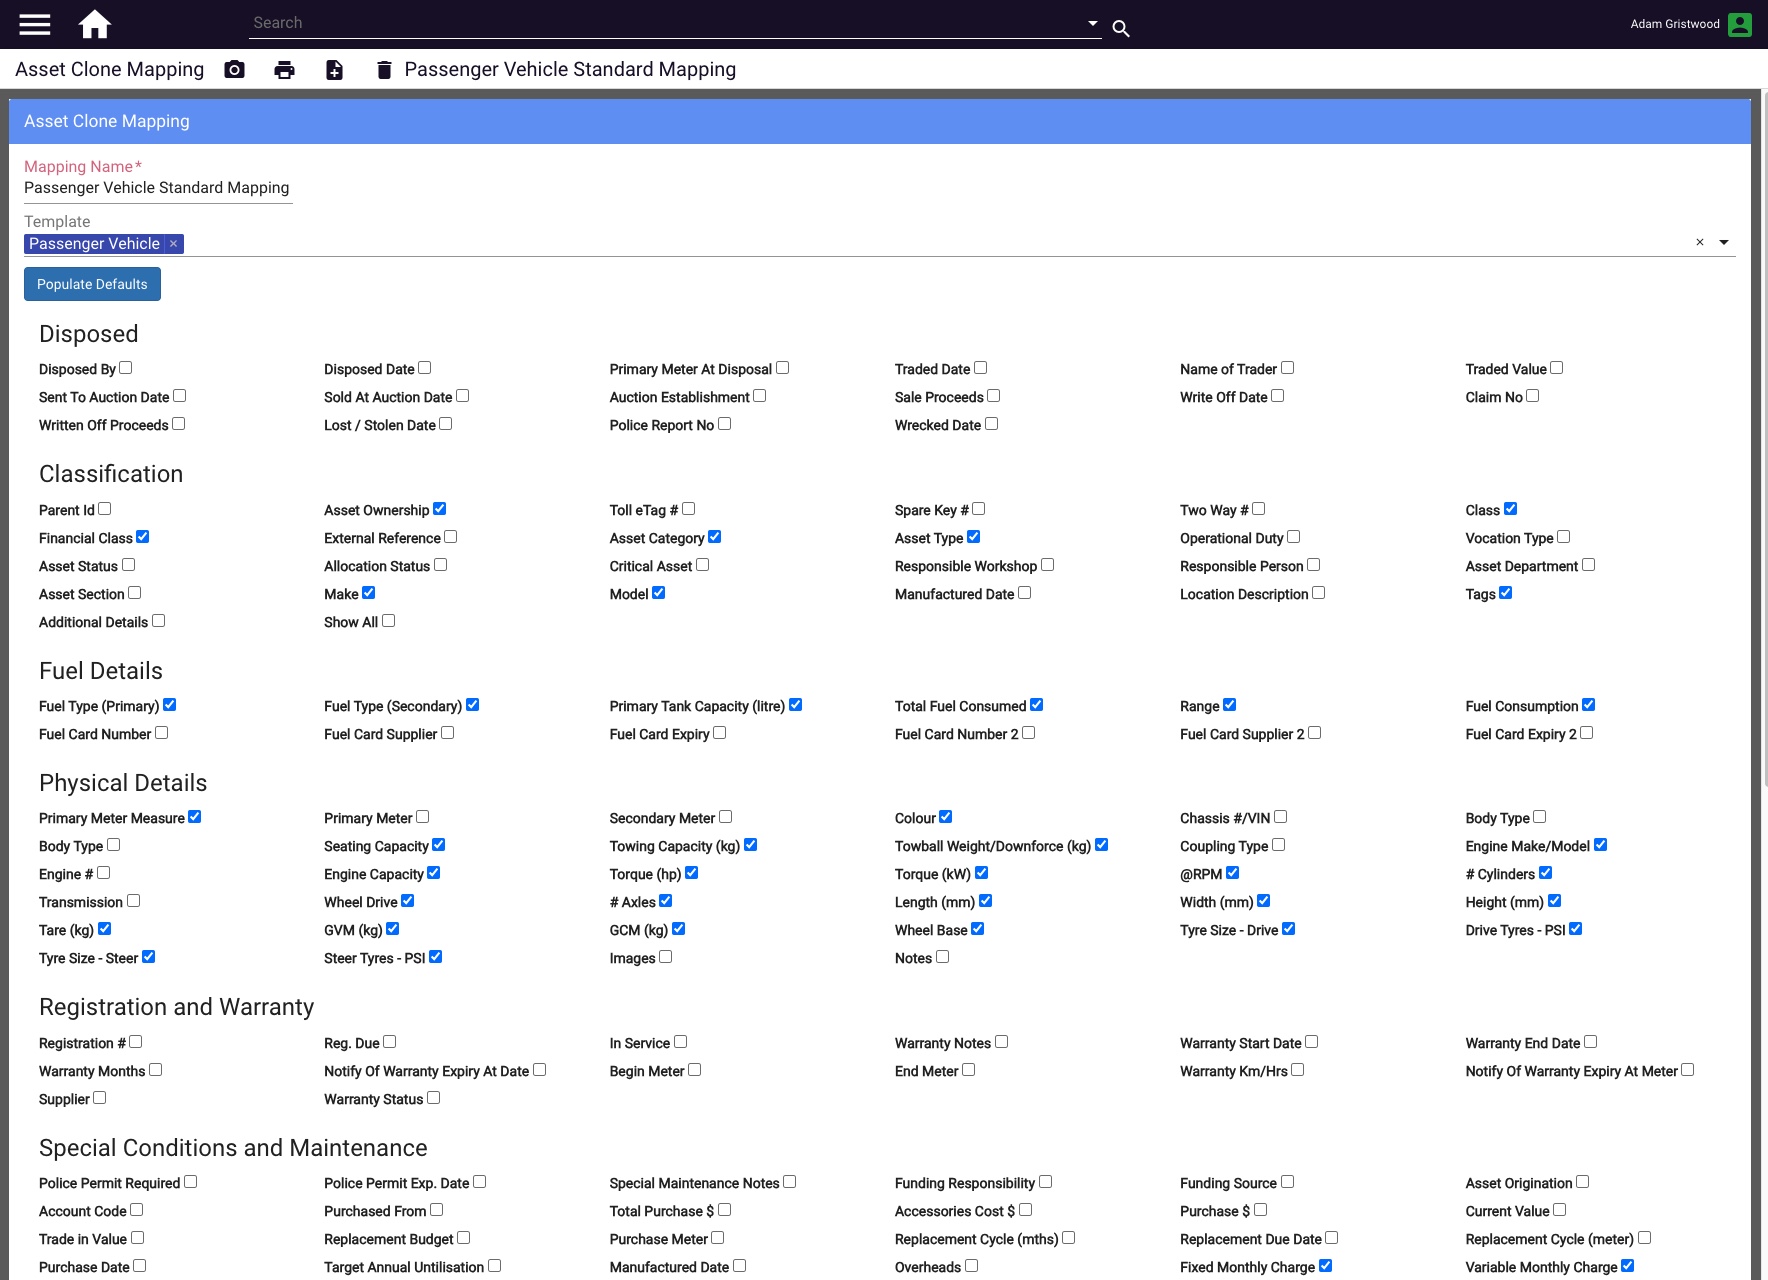
- On the Asset Templates page, select the + next to the Clone Mapping field.
- Enter a name for the mapping (e.g.
Passenger Vehicle Standard Mapping). - In the Template field, select the asset template this mapping applies to (e.g. Passenger Vehicle).
- Tick the checkboxes for the fields you want to copy across, or select Populate Defaults to select a standard set.
- Select the save tick to save the mapping document.
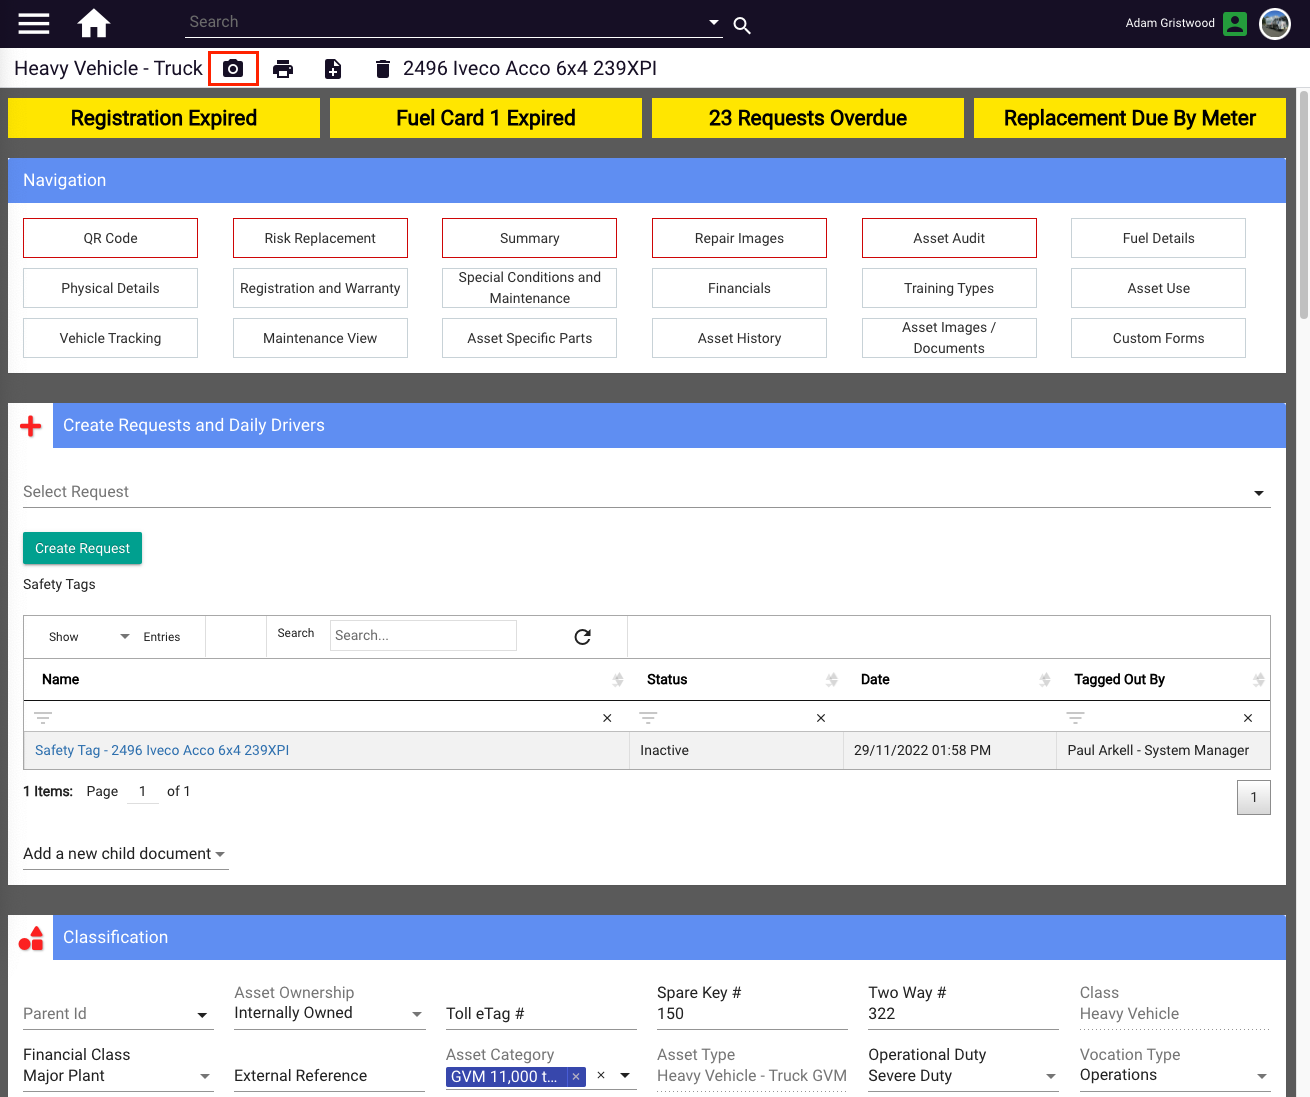
Setting an Asset Display Image
Asset display images appear throughout Formbird FLEET — on the asset's page and in asset tables — so assets can be identified at a glance. For the best results, use a consistent framing, orientation, and image quality across your fleet.
- Navigate to the asset.
- Select the camera button in the command bar at the top of the page.
- On a desktop or laptop, this opens the file upload interface.
- On a mobile or tablet, this opens the camera or image upload interface.
- Take a photo of the asset or select an existing image.
- Select Use, Open, or Upload (the label varies by device). The image saves automatically.
The image appears in the top-right corner of the asset's page and in any asset table that has an Image column.
Published: April 2026 · Formbird FLEET 4.2.8